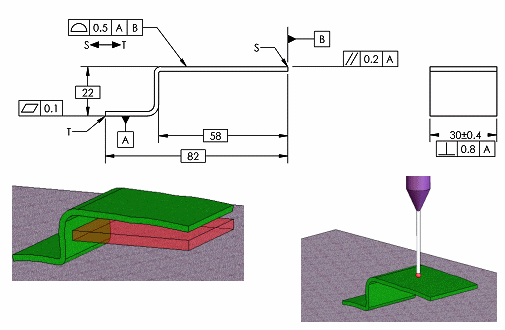
Orientation Tolerances Do Not Locate.
I keep
running into people who are convinced that parallelism locates
surfaces. Not True! On this drawing there is a 22mm
basic dimension that locates the considered surface relative
to datum A. The parallelism tolerance has nothing to do with
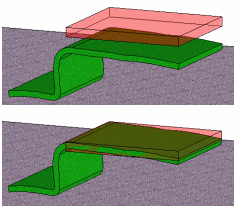
this dimension. All three illustrations show a parallelism
tolerance zone. The zone is a pair of parallel planes 0.2mm
apart which remain parallel to the datum simulator (the
surface plate) while floating to "find" the surface. That's
it. The profile of a surface tolerance is what controls the
location of the surface. The 0.5 tolerance is centered on the
basic location of 22mm. The parallelism tolerance floats
inside the profile tolerance.
 |
|

|
Inspection must
"find" the surface to determine if the surface is
parallel to the datum simulator regardless of where the
surface is. Only the profile of a surface tolerance uses
the 22mm basic dimension which provides location.
Without the profile tolerance the drawing would be
incomplete. |
|
|
|