| There are two types of
dimensions-toleranced and basic. Dimensions that are
toleranced may be toleranced on the field of the drawing, in a
general note or a supplemental block of the drawing format.
Basic dimensions are toleranced indirectly with geometric
tolerances. The geometric tolerance applies to the feature,
not the basic dimension. We have Rule #1 in the ASME Y14.5
standard which explains the meaning of a toleranced size
dimension. For other than size, toleranced dimensions can have
multiple meanings. For that reason, the ASME Y14.41-2003
standard on digital modeling recommends that direct
tolerancing only be used to define the size of a feature
[3.1.1, item(4)]. Geometric tolerancing is the preferred
method. They do allow some direct tolerancing for other than
size but in many cases recommend that the dimension origin
symbol be used to clarify the meaning.
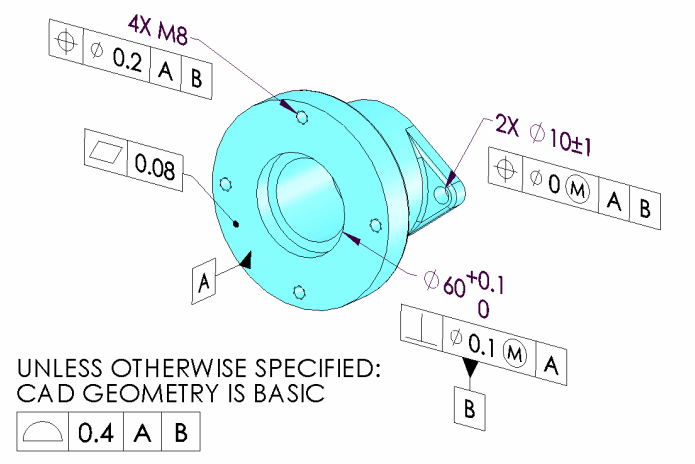
Here is a drawing made in
accordance with the ASME Y14.41-2003 standard. Any dimensions
not shown may be determined by making queries of the digital
model.
|

|
|
Digital product
data definition, reduced dimension drawings and
paperless part definition will continue to grow in
popularity. The sooner organizations embrace geometric
tolerancing and use toleranced dimensions primarily for
size, the sooner technology in this area will advance.
|
| |
| |
| |