Use Profile of a Surface
because it Is Easy to Measure
This is the third Tip in a series
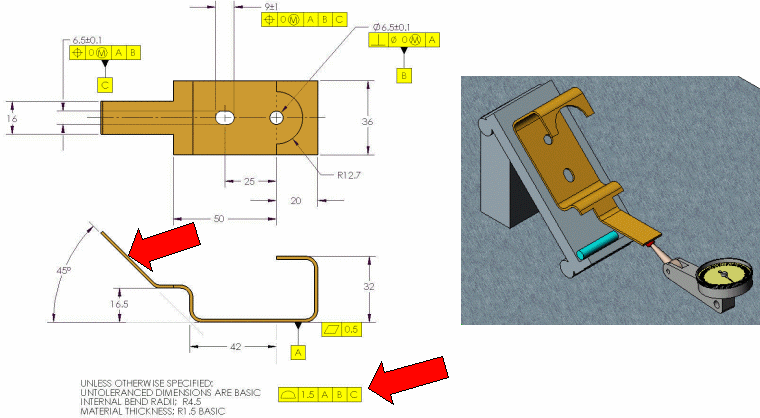
intended to illustrate how simple measuring profile of a
surface can be. The angled surface is a little more difficult
to measure since it is on an angle other than 0° or 90°. Once
again, though, it isn't because profile is being used, it is
because the surface is inclined. The inspector will have to do
a little trig. The part is positioned and aligned on the
sinebar relative to the datum features. It is helpful to place
a gage pin on the sinebar a known distance from datum axis
B.
|

|
|
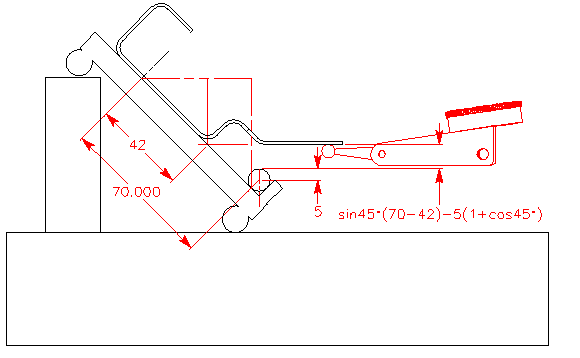
Although it can be
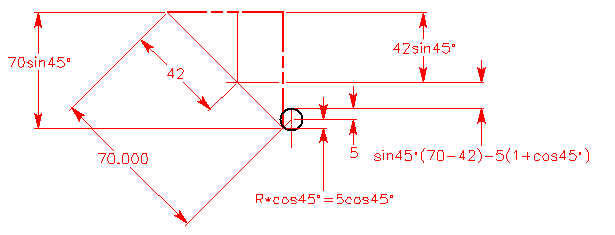
calculated, I usually use an inexpensive 2D CAD program
to easily find the distance from the top of the dowel
pin to the surface to be measured. If you prefer doing
the trig, here is the math: |
|

|
|
70sin45°-
42sin45°-(5+5 cos45°)
Or
sin45°(70- 42)-5(1+
cos45°)
or
11.2635±0.75mm |
|

| |