Use
Profile of a Surface Because it is Easy to Measure
To dispell the huge misconception
that profile of a surface is hard to measure, this series of
Tips illustrates how easy measurement of profile of a surface
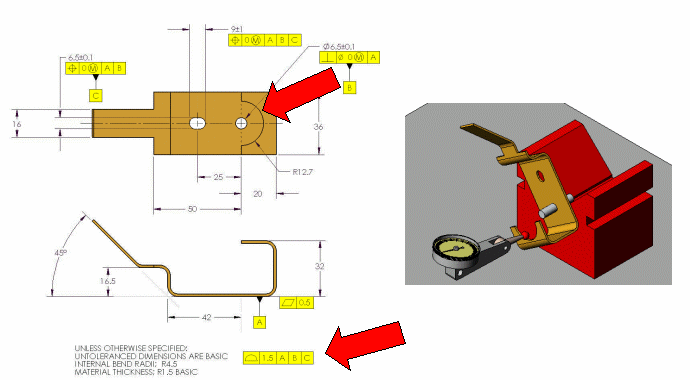
really is. The surface located by the R12.7mm dimension is
controlled by the general profile tolerance relative to datums
A, B and C. Since the R12.7mm dimension is BASIC, the
indicator would be mastered at 12.7mm relative datum axis B
established by the gage pin shown. When the part is rotated
about the gage pin, the indicator may not vary more than ±0.75
(half the total profile tolerance). What could be
simpler?
On a CMM, the operator would take polar
measurements relative to datum feature B. In this illustration
the part is not maintaining full contact with datum A
simulator. This will introduce a small amount of measurement
uncertainity. If measurements of the radius indicate that it
is marginally inside the tolerance zone, better simulation of
A should be considered. There is always uncertainty when
measuring. It just has to be understood and accounted
for.
|

|
|