Time to Stop the Nonsense
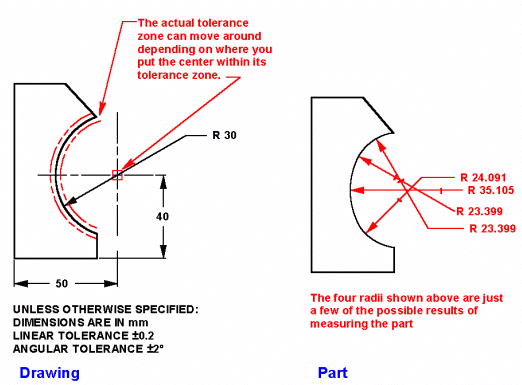
If you don't have opposed points
(180+ degrees of arc), you cannot reproducibly find the center
(axis) of a radius. Often a curved surface will be defined on
a drawing by locating the center and specifying a radius.
There is nothing wrong with this type of dimensioning. The
problem is that traditionally these dimensions are toleranced
directly or use the title block tolerance. Once the part is
made, someone has to determine where the center is out in
space to determine if the dimensions are in
tolerance.
When you have opposed points, you
can contact these points with an indicator or gage pin and
calculate the location of the center. Without opposed points,
you have to try to fit a radius to the surface and try to
determine where the center is. If you are taking sample points
with a CMM or vision system, you will get an answer; but, if
the radius is not perfectly round (and it never will be),
contacting different points will yield a different size radius
with a different center location.
|

|
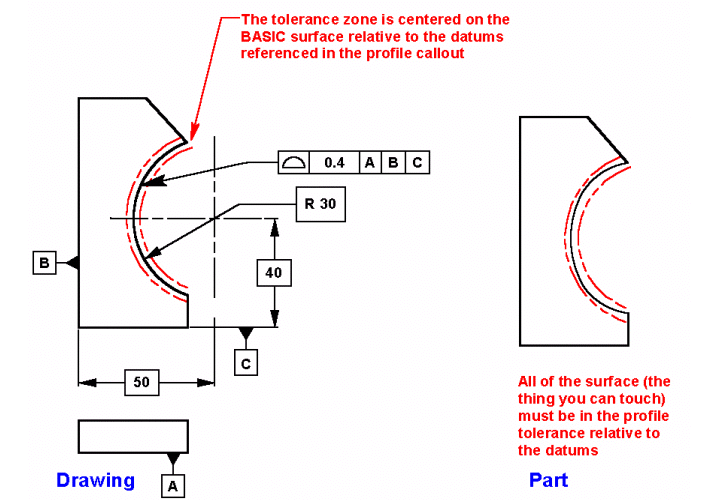
| This problem can be avoided by using
Profile of a Surface control. The dimensioning doesn't
change but the dimensions are made BASIC and originate
at the datums. The tolerance is on the surface not on
the dimensions. You might think of the dimensions as the
goal. You don't want to tolerance the goal. You do want
to specify how much the actual surface of the part may
deviate from the goal. Now measuring the part does not
involve trying to determine where the imaginary center
of the radius may be. |
|

|
|
|
| |