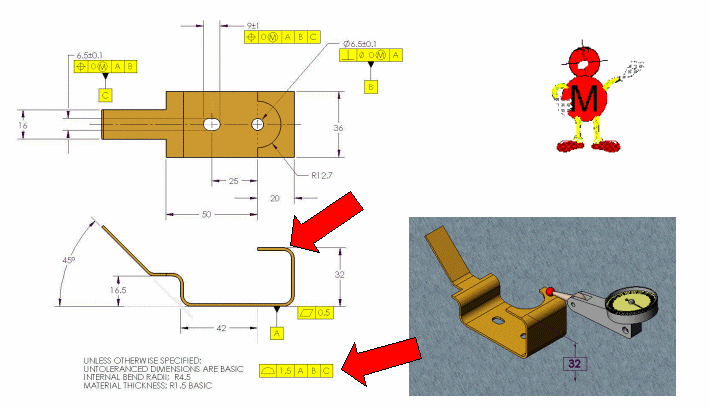
Use Profile of a Surface Because it is
Easy to Measure
There is this huge misconception
that profile of a surface is hard to measure. If profile is
applied to an extremely complex surface, sure, it is a
challenge - not because it is profile but because it is a
complex surface. Profile of a surface relative to a datum
reference frame, when applied to regular features is actually
easier to measure than surfaces controlled by plus/minus
tolerance since toleranced dimensions do not relate to datums.
As with any inspection, you can't check every point on the
surface. Merely check enough of the surface to be confident
the surface is in spec.
The next few Tips will
illustrate how easy it is to measure profile of a surface with
traditional inspection equipment. Of course, other equipment
such as CMMs could be used. The surface located by the 32mm
dimension is controlled by the general profile tolerance
relative to datum A. Since the 32mm dimension is BASIC, the
indicator would be mastered at 32mm relative to the surface
plate. When indicating the surface, the indicator may not
deviate from 32 by more than ±0.75 (half the total profile
tolerance). What could be simpler?
|

|
|
|
|